
If you find yourself in need of automating a PowerShell Script on a predefined schedule in Windows, this post is tailored for you. Below, we’ll explore the process of creating Scheduled Tasks to automate PowerShell script file execution, using both the graphical user interface (GUI) and PowerShell Command Line Interface (CLI).
Understanding Windows Task Scheduler
Task Scheduler is a powerful Windows application that enables users to create and schedule a wide range of tasks. From starting programs and sending emails to displaying messages or running scripts, Task Scheduler can be configured to execute actions based on user-defined schedules. As a Windows Systems Administrator, incorporating Scheduled Tasks into your routine is a common practice, and this post will guide you through the process.
For SQL Database Administrators, the SQL Server Agent is typically used to schedule PowerShell scripts and other tasks. Meanwhile, Linux Sysadmins rely on Cron for similar purposes.
Tutorial: Automating PowerShell Scripts
This demo includes:
[Pre-requisit] Create a PowerShell Script for Scheduling
[CLI] Create a Scheduled Task for a PowerShell Script
[GUI] Create a Scheduled Task for a PowerShell Script
[Pre-requisit] Create a PowerShell Script for Scheduling
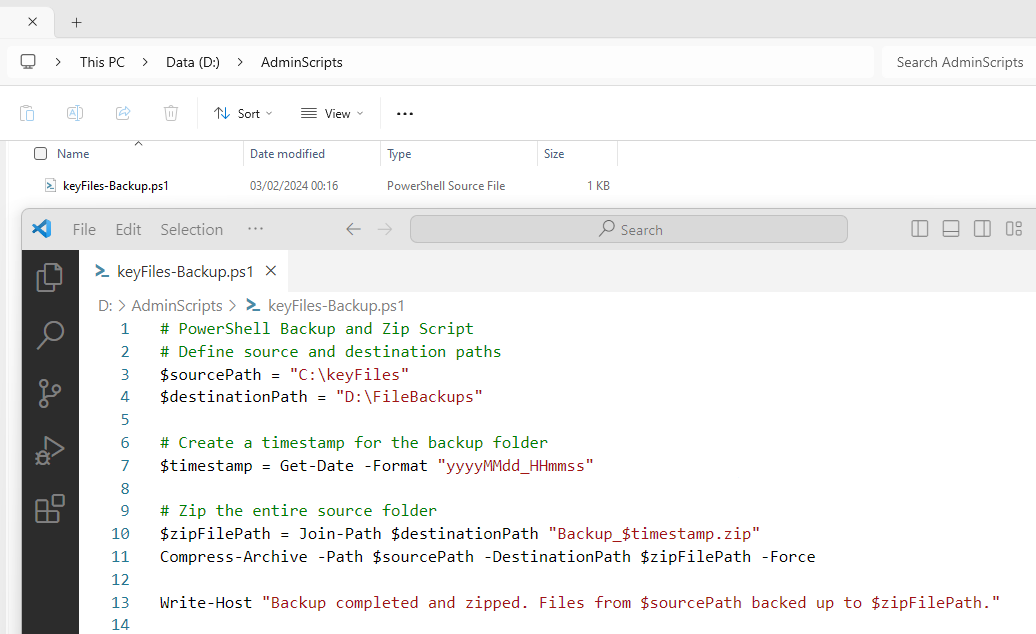
To start, you’ll need to develop the PowerShell script that you want to run on a schedule. In our example for this article, we create .ps1 script file that will automate backups and zipping of important files from a source to a destination directory.
# PowerShell Backup and Zip Script
# Define source and destination paths
$sourcePath = "C:\keyFiles"
$destinationPath = "D:\FileBackups"

# Create a timestamp for the backup folder
$timestamp = Get-Date -Format "yyyyMMdd_HHmmss"

# Zip the entire source folder
$zipFilePath = Join-Path $destinationPath "Backup_$timestamp.zip"
Compress-Archive -Path $sourcePath -DestinationPath $zipFilePath -Force

Write-Host "Backup completed and zipped. Files from $sourcePath backed up to $zipFilePath."
We’re going to copy this PowerShell script and save it as a .ps1 file on our local machine.
Once you have your PowerShell PS1 script saved and the path of it is noted, you’re ready to proceed to the next steps. Follow either the CLI or GUI methods whichever you prefer.
[CLI] Create a Scheduled Task for a PowerShell Script
To create a Scheduled Task using PowerShell, execute the script below in your Terminal/ISE.
Before running the script, amend the following variables:
– $taskName; set to your Scheduled Task Name.
– $taskPath; set to whichever folder in Task Scheduler you wish to use or create for this job.
– $scriptDirectory; set to the directory of your PowerShell script.
– $scriptFileName; set to your PowerShell script file name.
# PowerShell Script to Create a New Scheduled PowerShell Exec Task
# Variables
$taskName = 'DailyKeyFilesBackup'
$taskPath = '\Admin\'
$scriptDirectory = 'D:\AdminScripts'
$scriptFileName = 'keyFiles-Backup.ps1'

# Create a new Scheduled Task for local executing PowerShell Script
$action = New-ScheduledTaskAction -Execute 'PowerShell.exe' -Argument "-File $scriptDirectory\$scriptFileName"
$principal = New-ScheduledTaskPrincipal -UserId 'NT AUTHORITY\SYSTEM' -LogonType ServiceAccount
$trigger = New-ScheduledTaskTrigger -Daily -At '11:45 PM'
$settings = New-ScheduledTaskSettingsSet -WakeToRun
$task = New-ScheduledTask -Action $action -Principal $principal -Trigger $trigger -Settings $settings
$taskPath = $taskPath
# create a new scheduled task as per parameters above
Register-ScheduledTask $taskName -InputObject $task -TaskPath $taskPath -Force
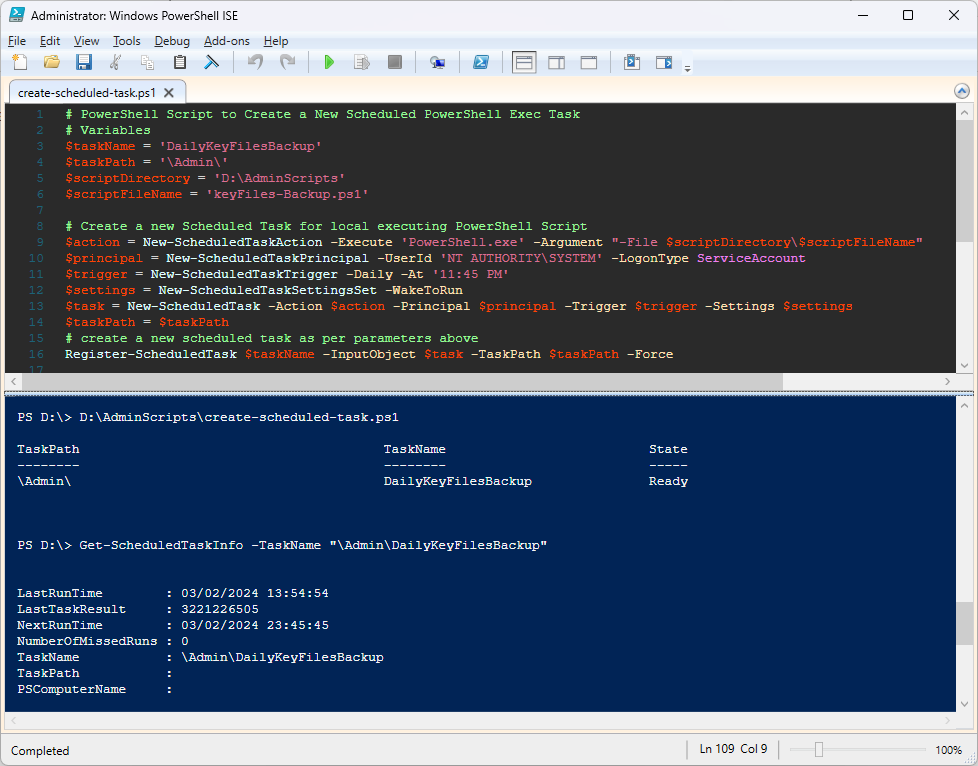
The screenshot above shows the Scheduled Task has been registered successfully, and we ran Get-ScheduledTaskInfo to check the existence of the new task.
Next, we can start the Scheduled Task via command using Start-ScheduledTask, and verify it ran by looking at the LastRunTime in the Get-ScheduledTaskInfo cmdlet:
# Start Scheduled Task
Start-ScheduledTask -TaskName '\Admin\DailyKeyFilesBackup'

# Check Scheduled Task Last Run Time
Get-ScheduledTaskInfo -TaskName '\Admin\DailyKeyFilesBackup'
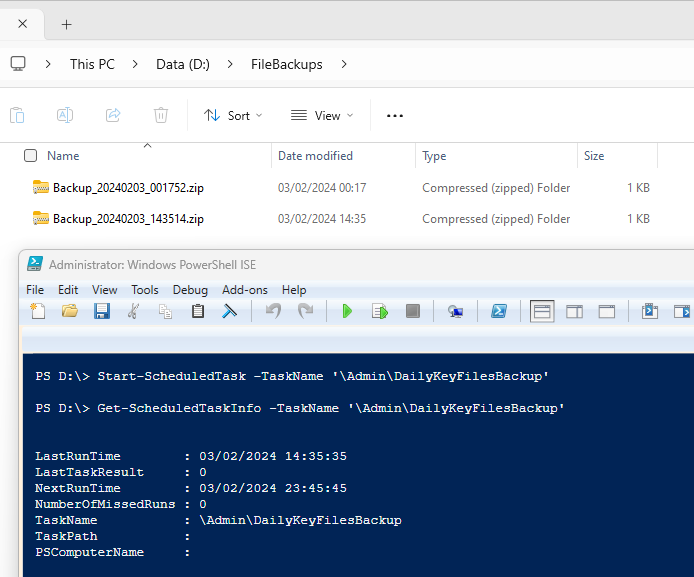
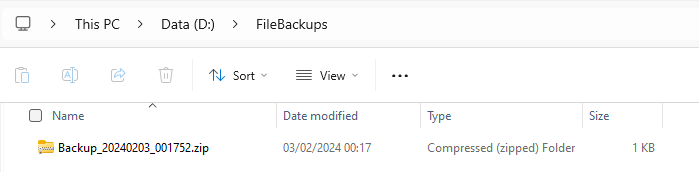
The scheduled job triggered successfully, and I’m also verify the PowerShell script successfully by viewing the latest backup files.
[GUI] Create a Scheduled Task for a PowerShell Script
For those who prefer a graphical approach, follow these steps:
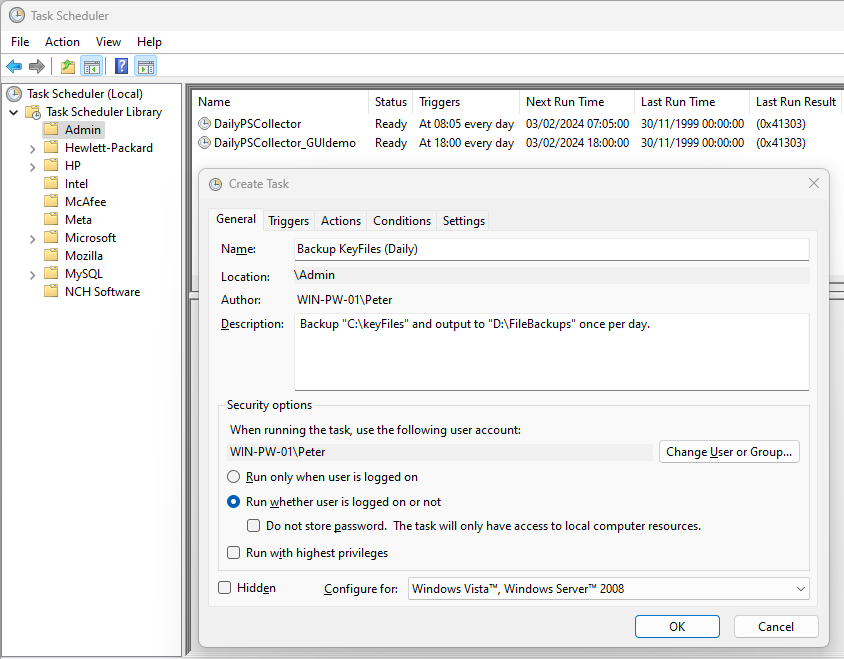
1. Open the Task Scheduler application and right-click in the empty area to create a new task.
2. Populate details in the General Tab.
3. Once done go to the Triggers Tab and set your desired execution schedule.
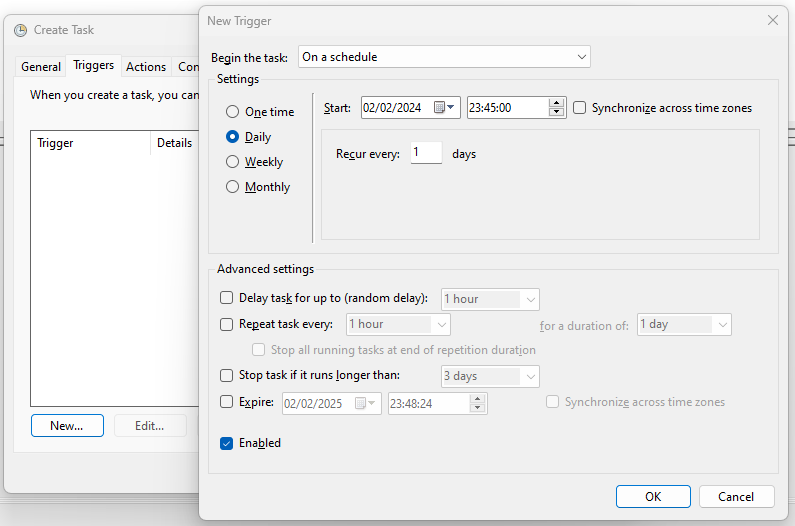
4. Ensure to specify the program/script as PowerShell with the appropriate script file in the Arguments field.
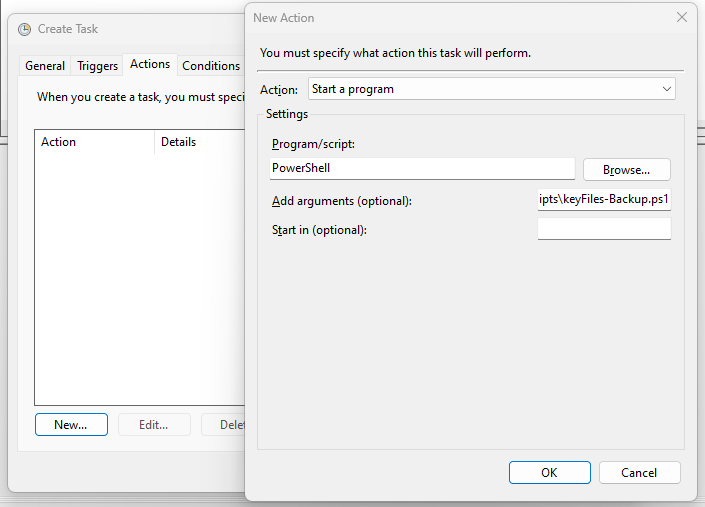
In the Actions tab enter the following:
Action: Start a program
Program/Script: PowerShell
Arguments: -File “D:\AdminScripts\keyFiles-Backup.ps1”
5. Review the Settings Tab and click OK to complete the process / create the Scheduled Task.
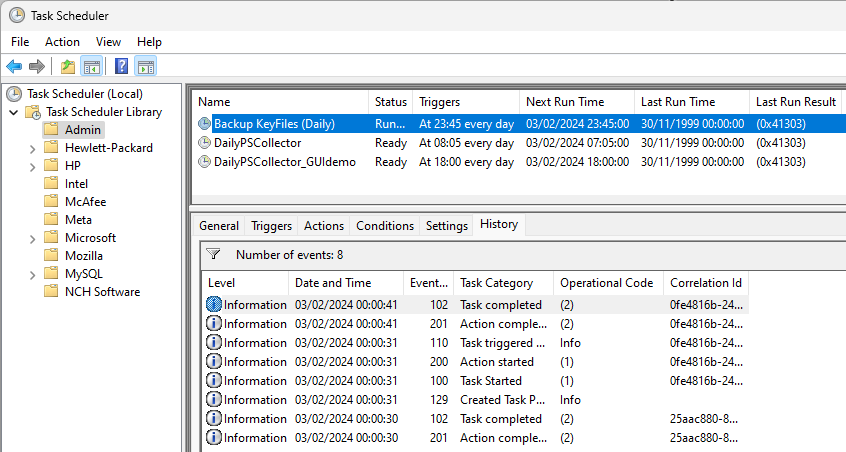
Now, you can view your newly created task in the Task Scheduler main window. At the right-hand sidebar, if useful you can enable All Tasks History so you can verify the scheduled task works successfully.
Depending on your script function, we can also very the job has been completed that way. We’ll verify our PowerShell script has backed up our KeyFiles for this demo:
That concludes the tutorial on automating PowerShell scripts with Task Scheduler in Windows. Incorporating this automation into your routine can enhance efficiency and ensure timely execution of critical tasks.