SQL Server Management Studio (SSMS) offers a feature called Import Flat File, which is a streamlined version of the Import Data feature. It minimizes the need for user intervention during a file import.
This feature does not include the option to save the import as a .DTS package, which makes it more suitable for quick imports of individual files but not for repetitive tasks that need automation.
In this guide, we will walk through the process of importing a CSV file into a SQL Server database using the Import Flat File feature.
Import a CSV File to SQL Server
To import a file into a SQL Server database table using SQL Management Studio (SSMS), we first have to identify the database we are restoring to. When you know this, right-click the database in the Object Explorer and select Tasks, then Import Flat File.
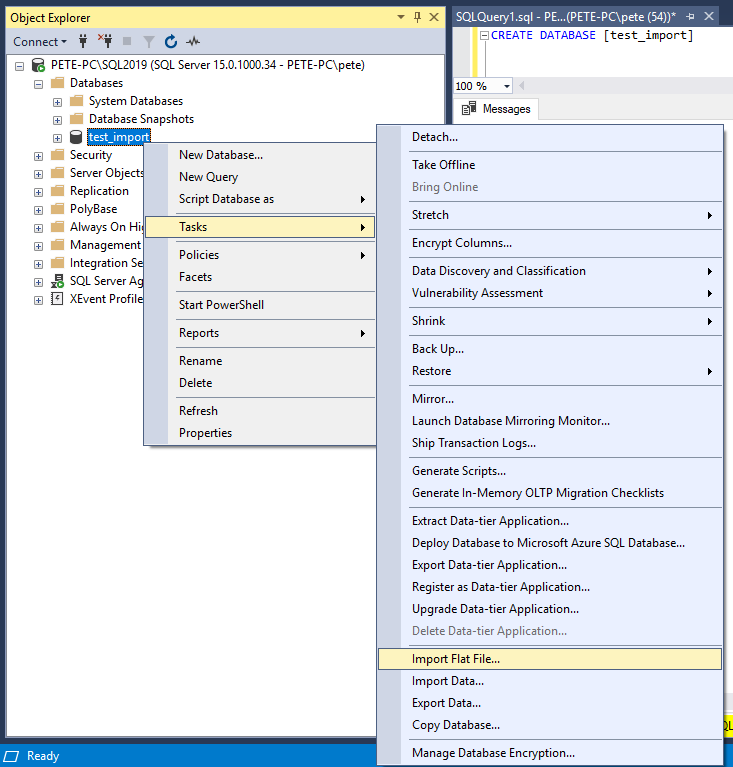
In the prompted Import Flat File wizard we will be configuring our settings for the SQL file import.
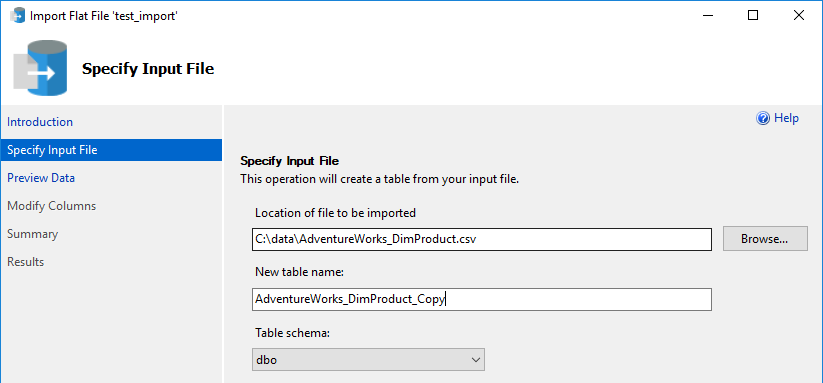
Step 1: Browse to the local file you want to import, enter the desired table name and amend the schema name accordingly.
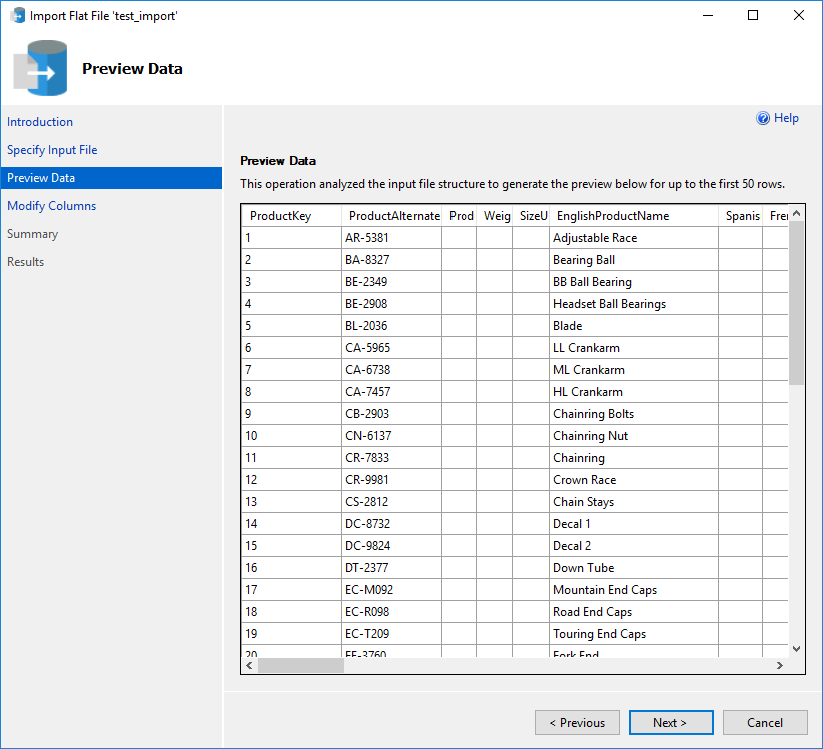
Step 2: Preview the data and click Next when ready.
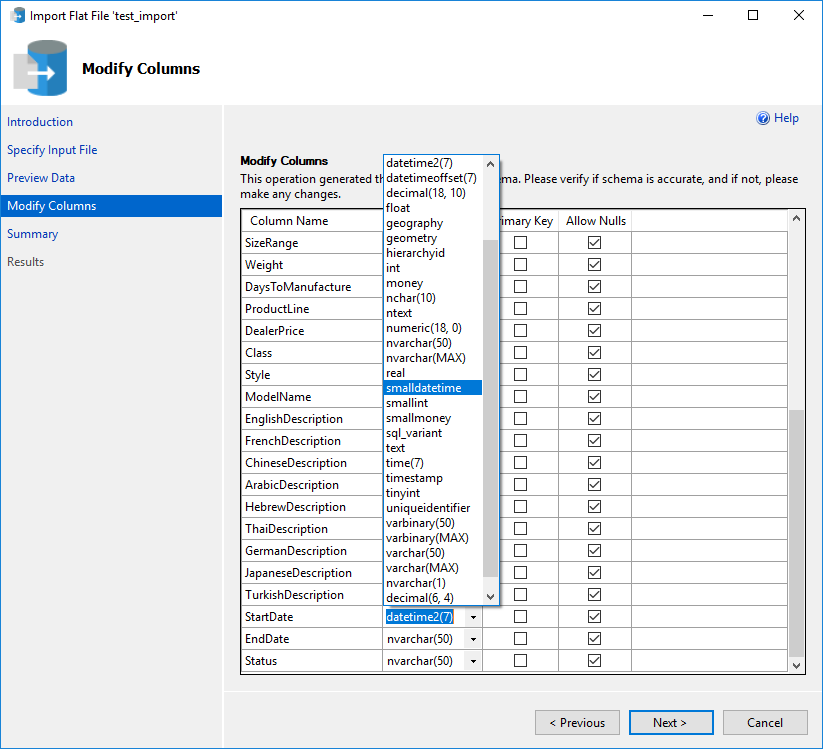
Step 3: Review Column Names/Primary Keys/NULLs, and take as much time as you need when selecting those Data types.
Step 4: Hit Next and Finish up the wizard when ready.
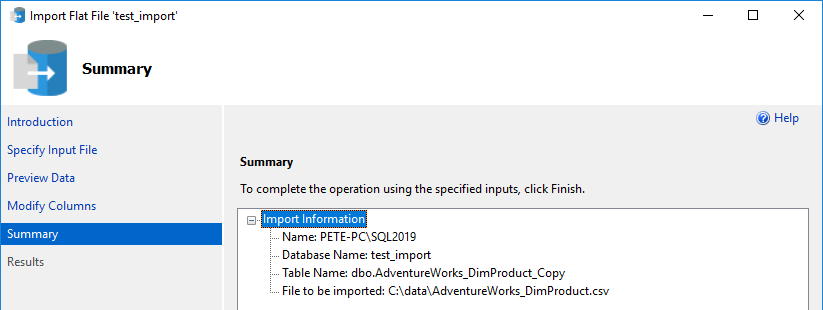
Step 5: Handle Errors
Data type conversion errors are common when importing and exporting data. It is important to pay attention to any error messages that appear during the import process. In case of errors, you can search the .csv file for the value mentioned in the error message, to identify the column that needs to be modified.
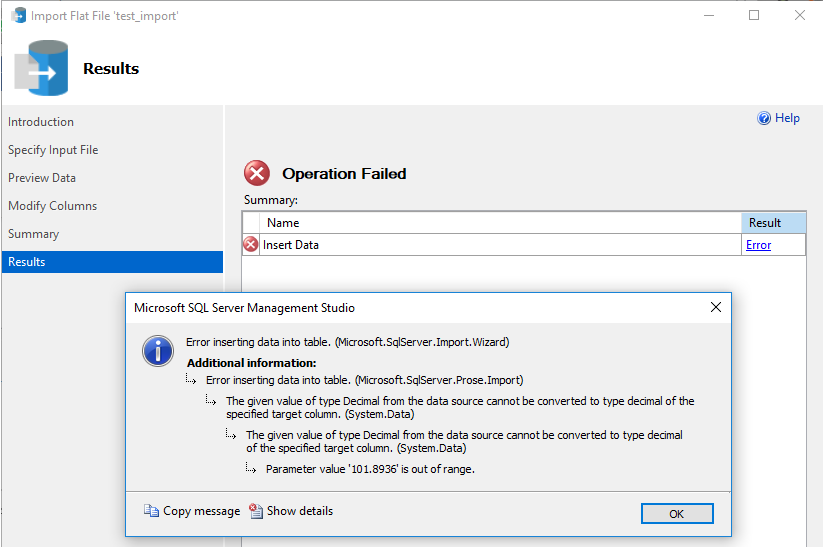
For the above error, I was able to find the value “101.8936” within the CSV file and update it so it conforms to the MSSQL datatype rules.
Step 6: Check the new table
If your flat file data import was successful, you can check the new table by querying it.
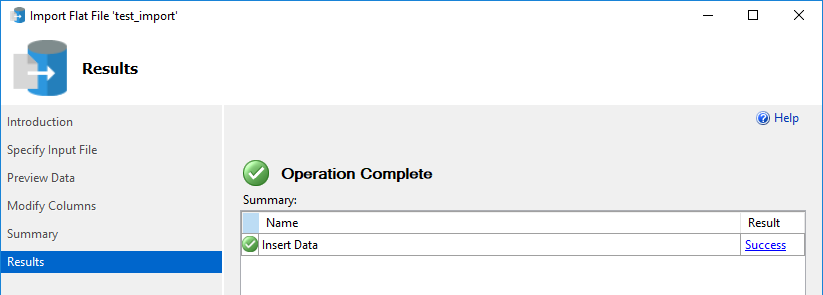
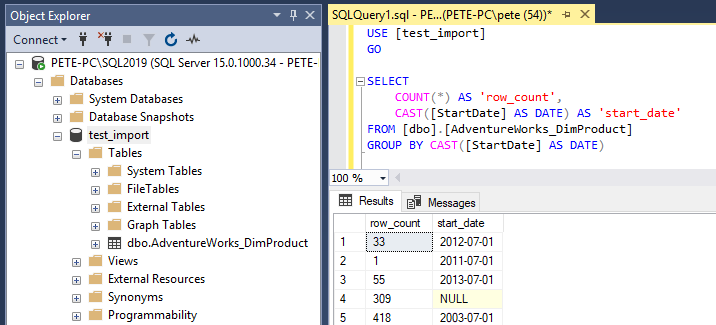
After the import process is complete, it is a good practice to check the new table to ensure that the data has been imported correctly.
