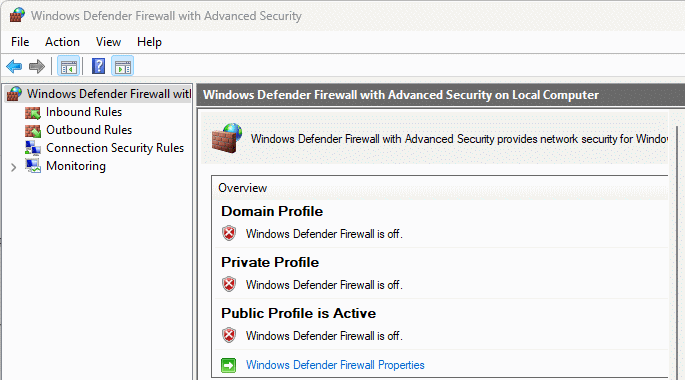
In this blog post, we’ll dive into a specific scenario: disabling the Windows Firewall using PowerShell.
It’s crucial to emphasize that this is a specific use case, as maintaining a robust level of security is paramount. The Windows Firewall serves as a crucial barrier against potential threats, and its default-enabled state contributes to the overall safety of your system.
Disable Local Firewall PowerShell
The PowerShell Set-NetFirewallProfile and Get-NetFirewallProfile commands will help you disable the firewall on the local system, as shown in the example below.
# Disable local firewall
Set-NetFirewallProfile -Profile Domain, Public, Private -Enabled False

# Get updated firewall status
Get-NetFirewallProfile | Format-Table Name, Enabled

These commands efficiently turn off the Windows Firewall for all three profiles – Domain, Public, and Private.

Considerations When Disabling the Firewall
While the ability to disable the Windows Firewall proves useful in specific scenarios, it’s essential to consider the implications. Disabling the firewall removes a critical layer of defense, potentially exposing your system to various security risks. Therefore, exercise caution and only disable the firewall when absolutely necessary.
Verifying Network Connectivity
One scenario where temporarily disabling the firewall becomes beneficial is during the verification of new network connectivity. When troubleshooting network issues, ruling out the local firewall as a potential blocker is a common step. By briefly turning off the firewall, you can assess whether it’s impeding the desired network connections. However, remember to promptly re-enable the firewall and add the rule required once the troubleshooting phase is complete to restore optimal security levels.

One thought on “Disabling Windows Firewall with PowerShell”