
Windows Subsystem for Linux (WSL) offers two versions: the latest iteration (WSL 2) and the original version (WSL 1). There may be instances where downgrading a WSL distribution becomes necessary, whether for tool compatibility or workflow preferences.
In this post, we’ll walk you through the simple steps to downgrade a WSL distribution from WSL 2 to WSL 1.
Step 1: Check Installed WSL Distributions and Versions
Begin by identifying the Linux distributions installed on your system and their current WSL version. Execute the following command in a PowerShell terminal:
# Check WSL distro versions
wsl -l -v
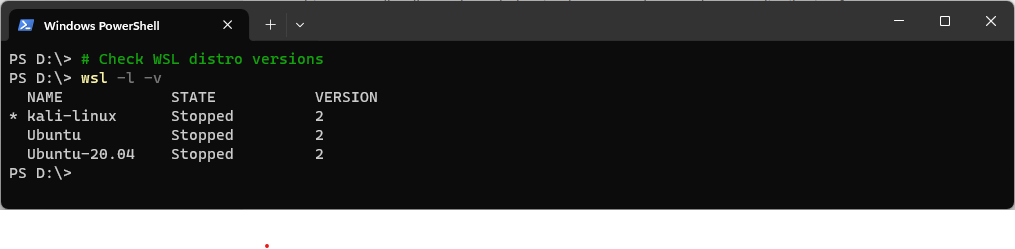
This command provides a list of all installed Linux distributions, along with their respective WSL versions.
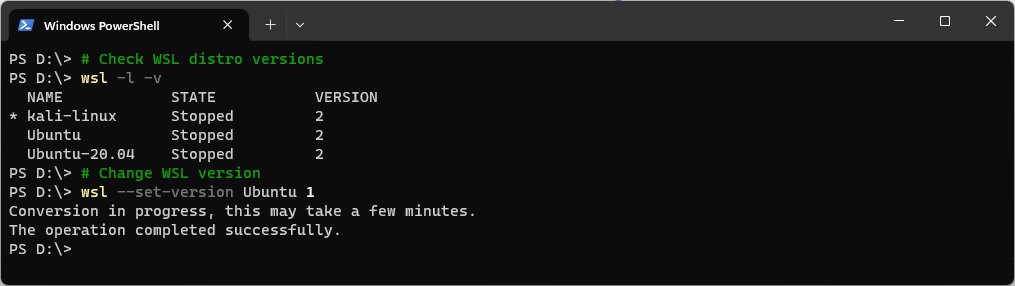
Step 2: Downgrade WSL Distribution
To downgrade a specific WSL distribution from WSL 2 to WSL 1, use the following command in a PowerShell terminal. Replace <distro_name> with the name of the Linux distribution you wish to downgrade:
# Change WSL version
wsl --set-version <distro_name> 1
Step 3: Verify Downgrade
Ensure the downgrade was successful by running the following command again:
wsl -l -v
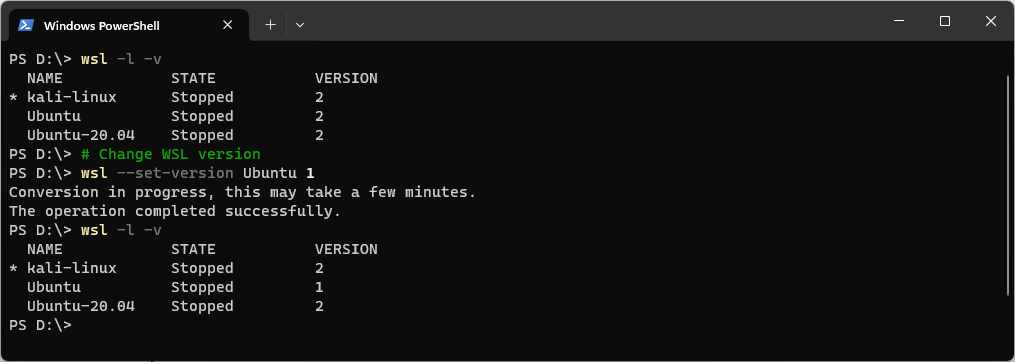
The output should confirm that the WSL version for the specified distribution has been changed to 1 as reflected in the screenshot above.
Tips:
– Before downgrading, consider backing up any important data within your WSL distribution to prevent potential data loss.
– Check for updates to your Linux distribution to ensure compatibility with WSL 1.
– Explore the Microsoft documentation for a deeper understanding of the differences between WSL 1 and WSL 2.