
Windows Subsystem for Linux (WSL) has revolutionized the way developers and users interact with Linux distributions on Windows. We can easily have several local Linux distributions installed on our Windows Computer for our development needs.
When managing multiple WSL distros, you might want to change your default distro as a workflow preference. This post shows an example of using the wsl -s <distro-name> command which sets your new default WSL distribution.
Step 1: Check Default WSL Distro
Before setting our default distro, we should know which WSL Linux distributions are installed on the local system. Open a PowerShell command terminal and run the following:
# WSL check default distro (name will be marked with *)
wsl -l -v
This command will display a list of all the WSL distributions installed on the system, and the distro with * on the name is your default WSL distro.

Identify the Linux distribution name you want to set as your default for the next step in this post.
Step 2: Set Default WSL Distro
To set your default WSL distro, use the following command, replacing <DistroName> with the name of your chosen distribution:
# Set new default WSL distro
wsl -s <distro-name>
Simply run the wsl -l command to verify the change.
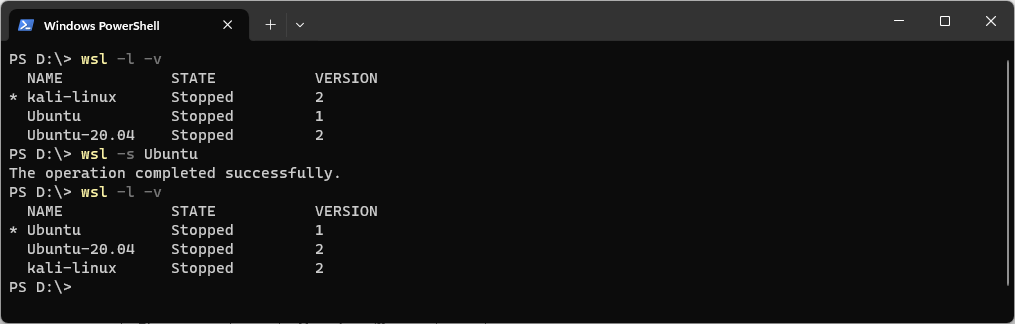
We can see in the example above, the Kali-linux default distro was changed to the Ubuntu distro. Next time the wsl command is run we will enter the Ubuntu distro.
Tips
– For more information on commonly used WSL commands, see Microsoft Docs: Basic Commands for WSL.
– If you’re looking for more tips on the Windows Subsystem for Linux, check out the WSL Post Category.