Running PowerShell commands with elevated privileges becomes necessary at times, especially when configuring system settings, installing software, or troubleshooting issues. In this guide, we’ll demo various methods for opening PowerShell as an administrator on different versions of Windows, including how to do so within Windows Terminal.
Open PowerShell Terminal as Administrator
Method 1: Using the Start Menu
Windows 10/11:
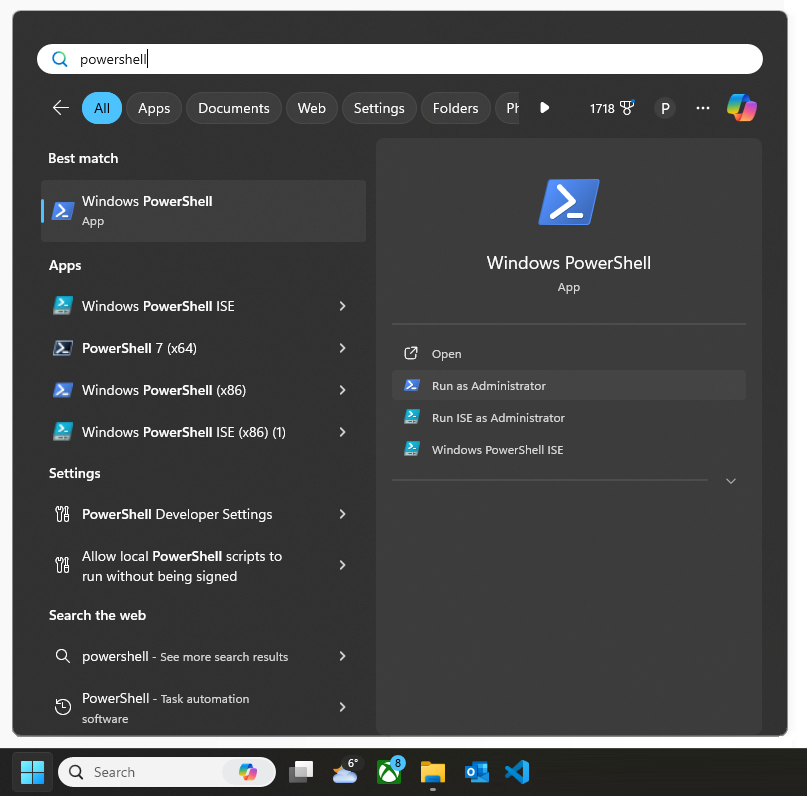
Hit the Windows button, type PowerShell and you should see the option to Run as administrator.

Windows 8.1:– Click Start, type PowerShell, right-click on Windows PowerShell from the search results, and choose Run as administrator from the options displayed.
Windows 7:– Click Start, navigate to All Programs > Accessories > Windows PowerShell, right click on Windows PowerShell, and select Run as administrator from the context menu.
Method 2: Using Keyboard Shortcuts
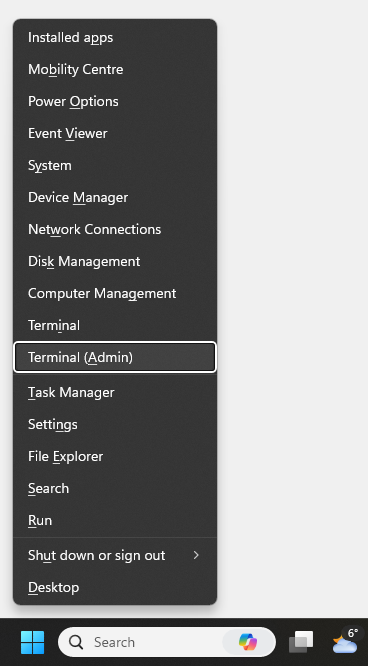
To open PowerShell as Admin using keyboard shortkeys, press Win + X and select Terminal (Admin) from the menu that appears:

If on Windows 7, press Win + R to open the Run dialog, type “PowerShell,” and press Ctrl + Shift + Enter.
Method 3: Using Windows Terminal
Since Windows Terminal is the best PowerShell Terminal on Windows 11, you should be running with this and the latest version of PowerShell, version 7.
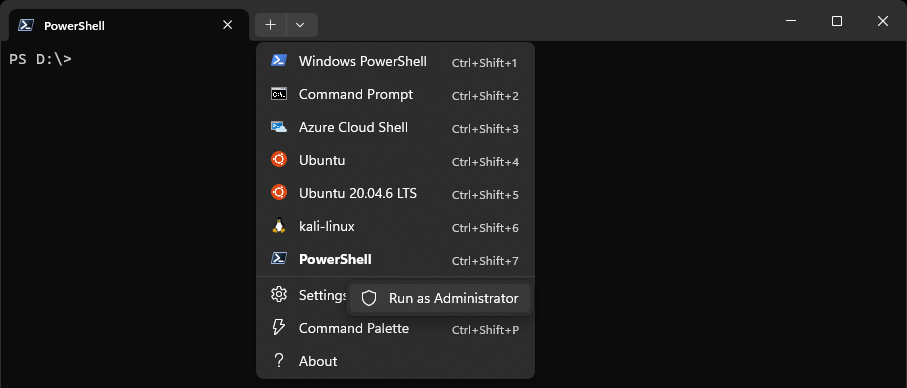
To open a PowerShell session as Administrator in Windows Terminal, you can hold CTRL and click the plus arrow in the top bar, this will work most of the time, assuming PowerShell is your default Terminal. Or you can navigate to it and select Run as Administrator as shown below.


One thought on “How to Open PowerShell as Administrator”