Sudo for Windows was announced recently (February 8, 2024) in the Windows Insider Preview Build 26052. This release was a great excuse for me to update my system sharply to see it in action!
What the introduction of sudo on Windows means to us is, a method for users to execute elevated commands directly from an unelevated console session. This solution removes the need to open a new terminal as Administrator, enhancing user productivity and experience.
This Windows release also brings another new feature, or perhaps some may even call it a bug fix, is when we install applications within a Terminal on Windows, we will no longer have to close and re-open the Window for us to be able to invoke the new Application. For example, when we run winget install putty we would normally have to close/re-open our terminal window to be able to open Putty from CLI.
How to Enable Sudo on Windows 11
1. Early Adoption of Sudo
This is, at the time of writing, is currently only available if you’re a member of the Microsoft Insiders Program. This means you get some Microsoft updates and features early, so you can test/develop with the latest software and report any issues back to the team at Microsoft.
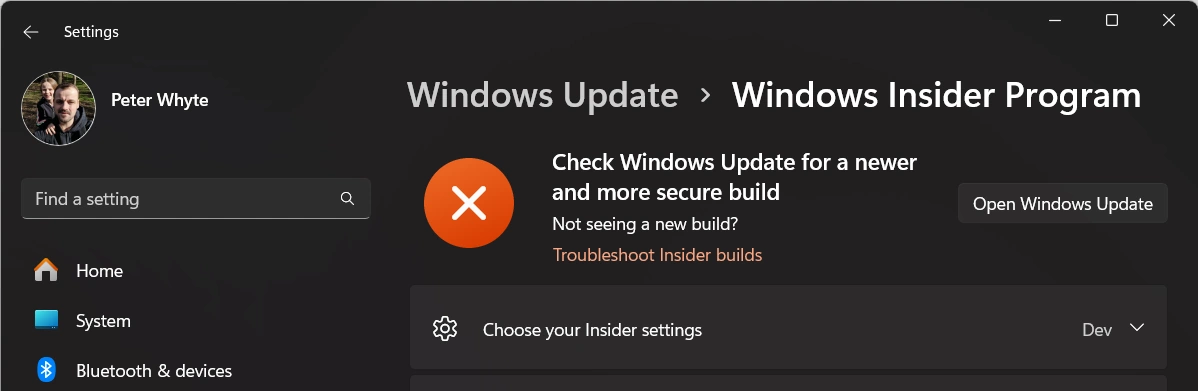
If you are following this guide now and in the near future, you will need to be in the Insider Program and set to the Dev Channel:
And we must download the latest Windows Update version available:
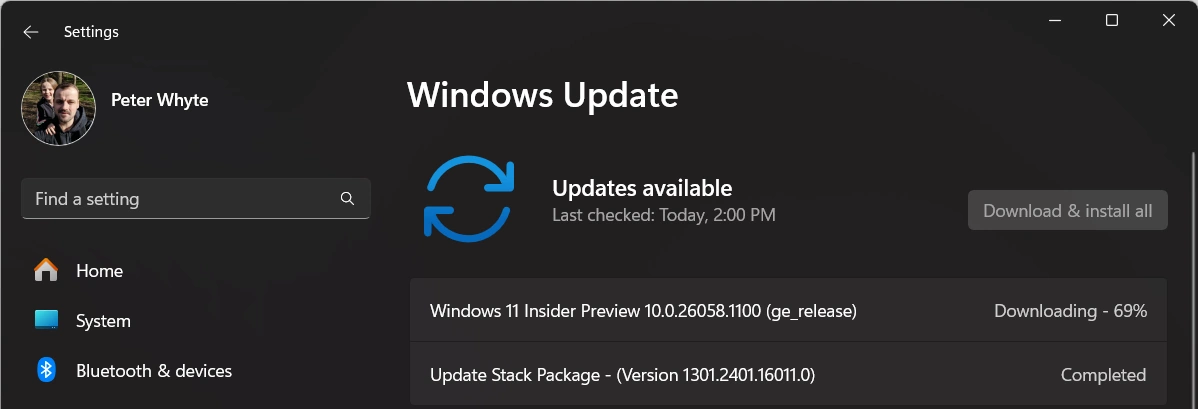
Once you are at Windows 11 Build 26052 or beyond, you can proceed to the next steps.
2. Enable Sudo on Windows 11
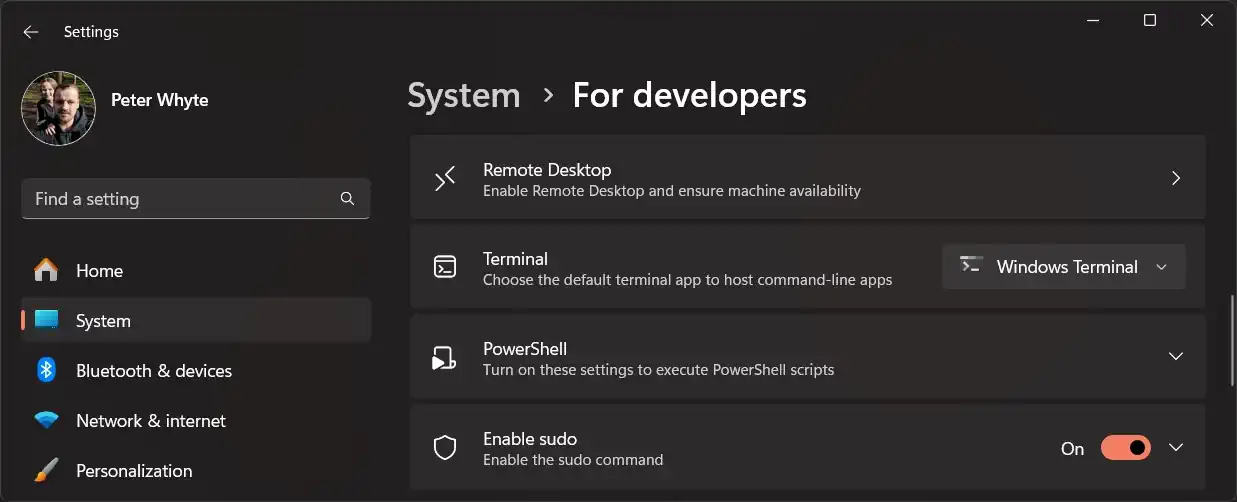
To enable Sudo for Windows, simply navigate to Settings > System (Sidebar) > For Developers and toggle on the “Enable Sudo” option.
Alternatively, you can enable Sudo for Windows by executing the following command in an elevated console session (run PowerShell as Administrator).
# Enable sudo (Windows 11 build 26052+)
# Run within Administrator Windows PowerShell Session
sudo config --enable enable

3. Demo of Sudo on Windows
Now that we have Sudo enabled on our Windows Computer, let’s dive into examples.
3.1 Run Single Commands with Sudo
I’ve been experimenting with different commands using sudo to determine their compatibility. In a video demonstration by Microsoft, sudo is used to execute the “netstat -ab” command. I can’t see additional examples available yet, but it’s important to note that the feature is still in its preview or early release stage.
For the most up to date information on Sudo for Windows check out this Microsoft Documentation Page. I’ll also try keep this post updated if there’s any updates in the works.
Here’s a list of single sudo commands that have worked for me in testing:
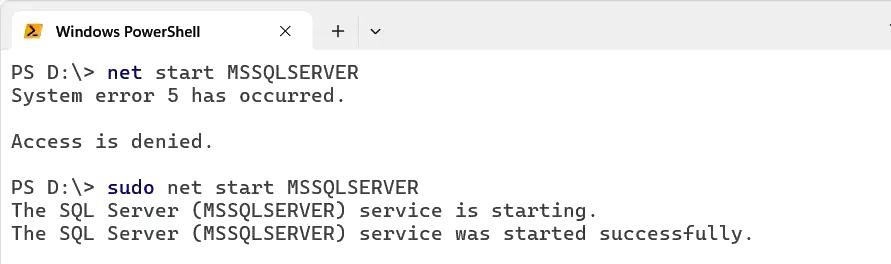
# Working sudo single command examples
sudo net stop MSSQLSERVER
sudo net start MSSQLSERVER
sudo net use
sudo regedit
sudo ipconfig
sudo netstat
sudo mkdir
sudo diskpart
sudo fsutil
sudo powercfg
sudo icacls
In the example below I attempt to start my local SQL Server Service but access is denied. I then re-run with sudo, and it starts up successfully, after accepting the User Account Control (UAC) dialog prompt.

3.2 Elevate a PowerShell Terminal to Admin with Sudo
In this next example we are going to promote our non-admin PowerShell Terminal session to an Administrator PowerShell session. This is done simply by running sudo pwsh.

4. Sudo vs Runas
The sudo command on Windows, as described in the Microsoft Docs page, primarily allows for quick elevation of commands as administrator, similar to runas, but lacks the ability to run programs as other users, a feature present in runas.
The Windows sudo project isn’t derived from or adapted from the Unix/Linux sudo project; rather, Sudo for Windows is a distinct implementation tailored specifically for the Windows environment.