If you’re a developer or someone who prefers to work with Linux tools, but you’re stuck using a Windows operating system, then Windows Subsystem for Linux (WSL) is an excellent solution for you.
WSL is a feature in Windows 10 and later versions that allows you to run a Linux distribution natively on Windows, without the need for a virtual machine or dual-boot setup.
In this blog post, we’ll guide you through the process of installing WSL on your Windows machine.
Enable the WSL Windows Feature
The first step in installing WSL is to enable the feature on your Windows machine. To do this, follow the steps below:
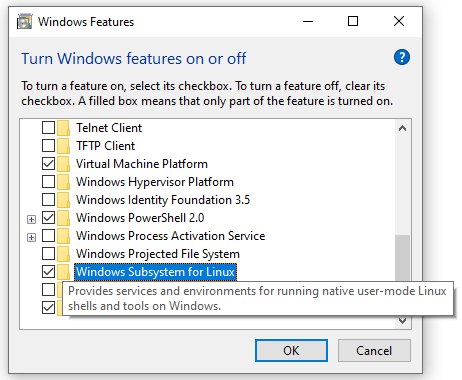
- Open the Start menu and search for “Turn Windows features on or off.”
- Click on the search result that appears to open the “Windows Features” window.
- Scroll down to find “Windows Subsystem for Linux” and tick the checkbox next to it.
- Click “OK” to apply the changes.
- Restart your computer when prompted.
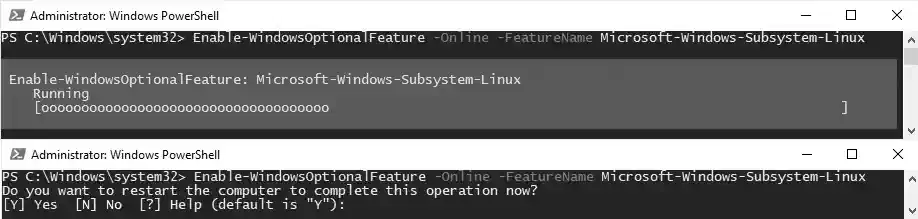
Alternatively, we can enable the WSL feature by running the following PowerShell command:
# Enable Microsoft-Windows-Subsystem-Linux Feature
PowerShellEnable-WindowsOptionalFeature -Online -FeatureName Microsoft-Windows-Subsystem-Linux
Install a Linux Distribution for WSL
Once you’ve enabled WSL on your Windows machine, the next step is to install a Linux distribution of your choice. You can download a Linux distribution from the Microsoft Store or through other sources, such as the official website of your preferred Linux distribution.
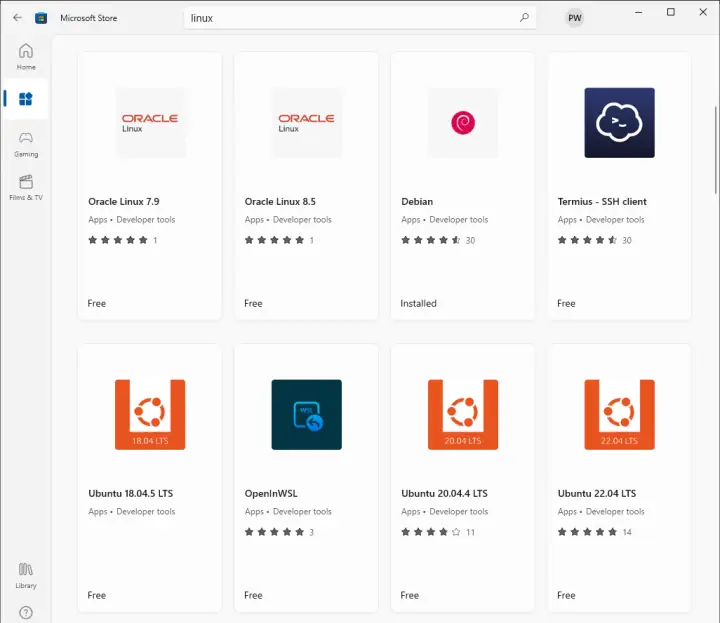
To download a Linux distribution from the Microsoft Store, follow these steps:
- Open the Microsoft Store app on your Windows machine.
- Search for your preferred Linux distribution (e.g., Ubuntu, Debian, Kali Linux).
- Click on the search result to open the Linux Distribution’s page.
- Click the “Get” button to download and install the Linux distribution on your Windows machine.
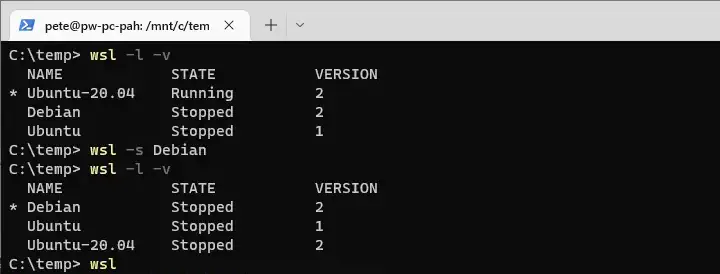
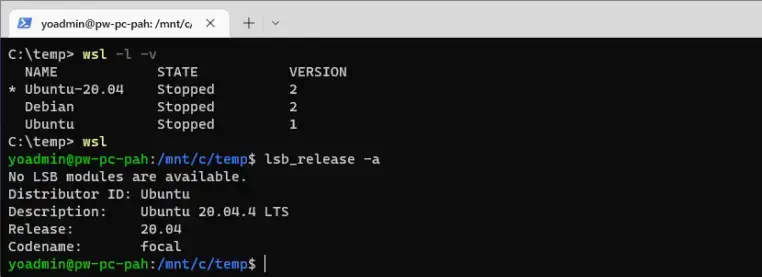
Tip 1: How to List Installed WSL Distros & Versions
If you’ve installed multiple Linux distributions on your Windows machine, you can list them using the following command in the Windows Command Prompt or PowerShell:
# List Installed WSL Distros
wsl --l --v
This command will display a list of all installed WSL distributions, along with their version numbers and status as shown in the screenshot below.
Tip 2: How to Change Your Default WSL Distro
If you’ve installed multiple WSL distributions on your Windows machine, you can set a default distribution to be used whenever you run WSL commands. To do this, follow these steps:
- Open the Windows Command Prompt or PowerShell.
- Type the following command, replacing “DistroName” with the name of the distribution you want to set as default:
# Set Default Linux Distro WSL
wsl --set-default DistroName
- Press “Enter” to apply the changes. You can verify by running the command to check installed WSL distros as shown above.