
In this blog post, we’ll guide you through the process of creating a new firewall rule using PowerShell.
Firewall rules help control network traffic, allowing or blocking specific connections. Setting up the right rules improves security and ensures necessary applications function properly.
Why Create a New Firewall Rule?
Firewalls play a crucial role in safeguarding your systems against unauthorized access and potential security threats. By creating a new firewall rule, you gain control over incoming and outgoing network traffic, ensuring a secure and well-defined network environment.
Open PowerShell as Administrator
To create a new firewall rule, you need administrative privileges. Right-click on the PowerShell icon and select “Run as Administrator” to open an elevated PowerShell session.
Opening PowerShell as Administrator even a common reminder even for experienced Windows Administrators!
Use the New-NetFirewallRule Cmdlet
The New-NetFirewallRule cmdlet is a quick way to create a new firewall rule in PowerShell.
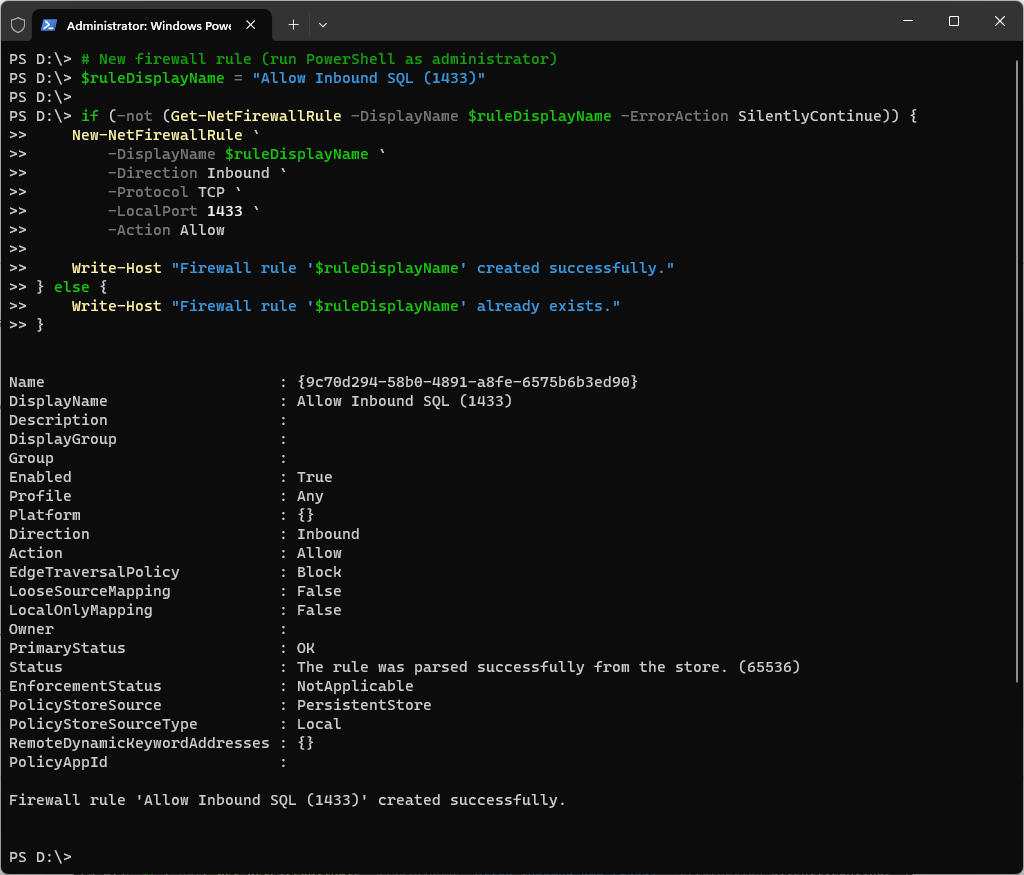
Here’s an example of adding a new rule for a SQL Server:
# New firewall rule (run PowerShell as administrator)
$ruleDisplayName = "Allow Inbound SQL (1433)"

if (-not (Get-NetFirewallRule -DisplayName $ruleDisplayName -ErrorAction SilentlyContinue)) {
    New-NetFirewallRule `
        -DisplayName $ruleDisplayName `
        -Direction Inbound `
        -Protocol TCP `
        -LocalPort 1433 `
        -Action Allow

    Write-Host "Firewall rule '$ruleDisplayName' created successfully."
} else {
    Write-Host "Firewall rule '$ruleDisplayName' already exists."
}
Verify and Manage Rules
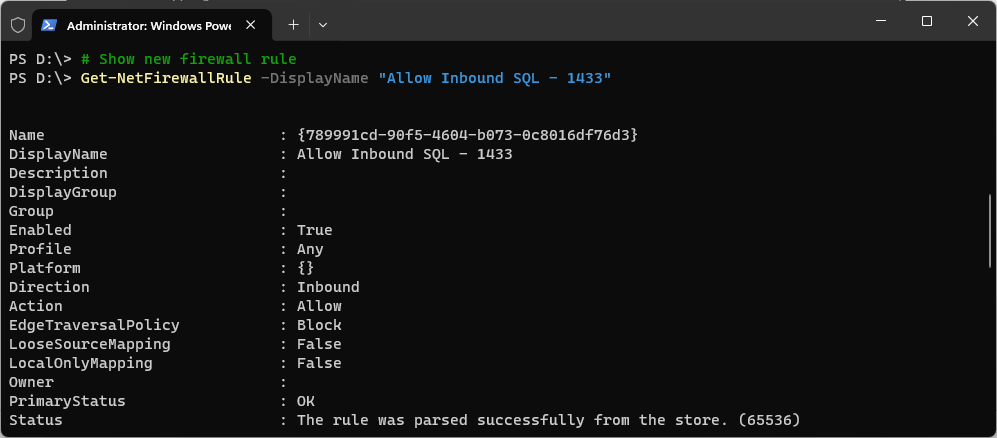
To view your newly created rule, use the Get-NetFirewallRule cmdlet:
# Show new firewall rule
Get-NetFirewallRule -DisplayName "Allow Inbound SQL - 1433"
Additionally, you can modify or remove rules using Set-NetFirewallRule and Remove-NetFirewallRule respectively.
Conclusion
For another perspective on this guide, check out this other blog post: How to Create a Firewall Rule using PowerShell
You may also need more than local firewall rule changes for your network tests to be successful. If in a corporate environment, you’ll likely be behind more than one firewall, and to allow a new network flow you should submit a request to the network team.
Hope this guide helps!
2 thoughts on “PowerShell: Creating a New Firewall Rule”