This post shares a quick guide on how to split panes in Windows Terminal. Panes in Windows Terminal enhances productivity by allowing you to have multiple terminal sessions showing simultaneously within a single terminal window.
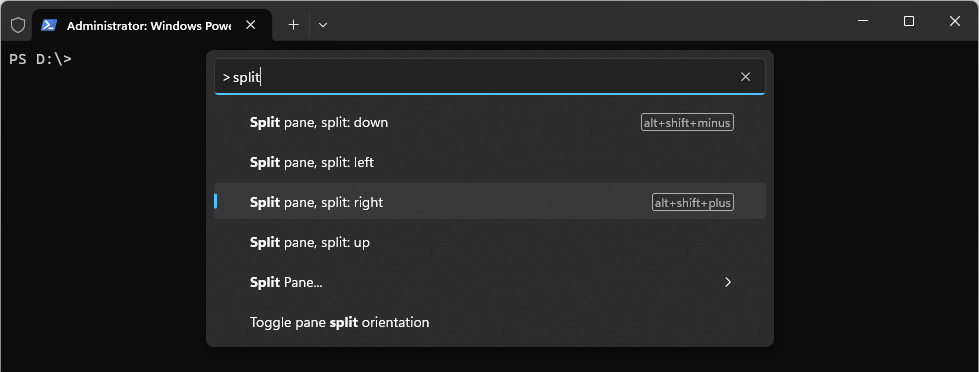
To split a Windows Terminal pane, hold CTRL + SHIFT + Plus (+) on the keyboard, or we can open it via the Command Palette which is shown in the example below.
Accessing the Windows Terminal Command Palette
We’re going to open a new split pane via the Command Palette in this example. There are two ways to open the Command Palette:
1. Keyboard Shortcut: Press Ctrl + Shift + P to open the Command Palette directly.
2. Dropdown Menu: Alternatively, you can click on the dropdown menu in the top-right corner of the terminal window and select “Command palette”.

Splitting Panes in Windows Terminal
Once you’ve opened the Command Palette, type “split” as shown in the above screenshot. As you type, you’ll see options related to splitting panes appear in the list below the search bar.
Alternatively, to split a Windows Terminal pane, hold CTRL + SHIFT + Plus (+) on your keyboard.

The above example shows 2x PowerShell terminals working side-by-side, we can split into more terminals in the same window, or be using this with WSL Linux Distros.
To close a Windows Terminal split pane, the short key CTRL + SHIFT + W.
By mastering this feature, you should be able to streamline your workflow and accomplish more in less time. For more information on Windows Terminal Panes, check out the Microsoft documentation page. This resource includes detailed explanations and handy GIF demos for each feature, ensuring you have all the tools necessary to maximize your terminal experience in Windows.

One thought on “Windows Terminal: How to Split Panes”