
In this guide, we’ll walk you through installing Windows Subsystem for Linux (WSL) on Windows. This post also includes tips on managing your WSL environment with multiple Linux Distros installed.
WSL empowers Windows users to develop and run applications within a GNU/Linux environment with ease. Prior to this feature release, achieving similar functionality often required the use of Virtual Machines (VMs), and dual boot setups were prevalent for those seeking local test environments.
You system will need to be on Windows 10 version 2004 or later (Build 19041 and above) or Windows 11 for this to work.
Installing Windows Subsystem for Linux (WSL)
1. Install WSL Feature
1.1. Install WSL Feature (without Distro)
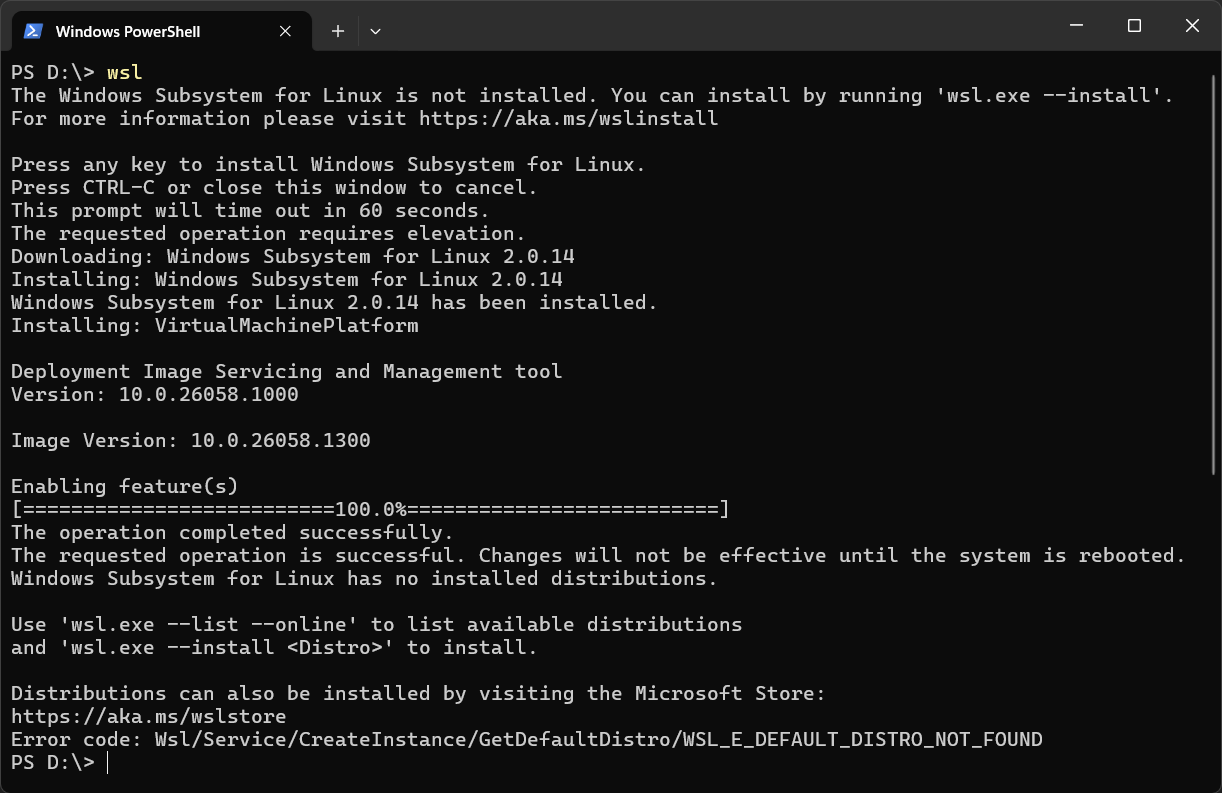
To install WSL on the more recent versions of Windows 10 & 11, we can simply run ‘wsl‘ in our PowerShell Terminal to activate the WSL installation process.
The screenshot below shows a PowerShell session running the ‘wsl‘ command, and then the terminal recognises it’s not installed, so we proceed with the installation by accepting the authentication prompt.
1.2. Install WSL (with Distribution)
Alternatively, as described in the MS Docs on Installing WSL, we can quickly install the WSL with Ubuntu using the command below:
# Install WSL with Default Linux Distro (Ubuntu)
wsl --install
This command installs WSL with Ubuntu as your default distro. You can install with a specific WSL Linux distribution using the ‘--distribution‘ parameter as described in the Microsoft WSL Install Docs.
2. Check Installed and Available WSL Distributions
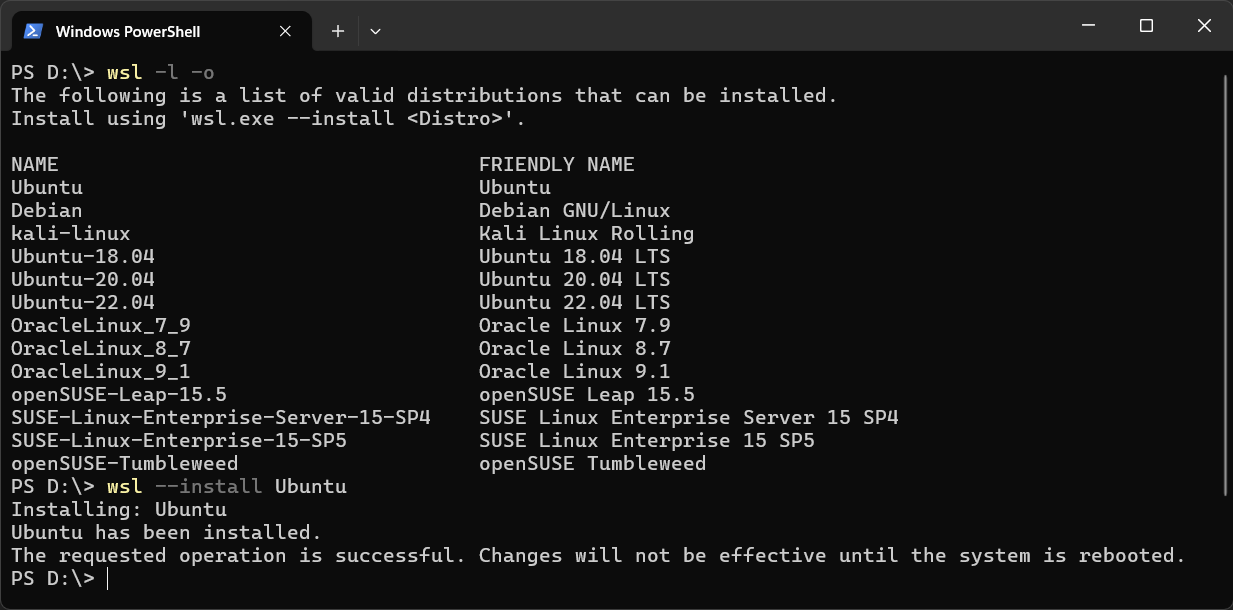
We can run a command in our PowerShell Terminal to check installed Linux Distributions, as well as check available Linux Distros we can install. The WSL commands below are short versions of the --List and --Online parameters:
# List installed WSL distros
wsl -l

# List available WSL distros
wsl -l -o

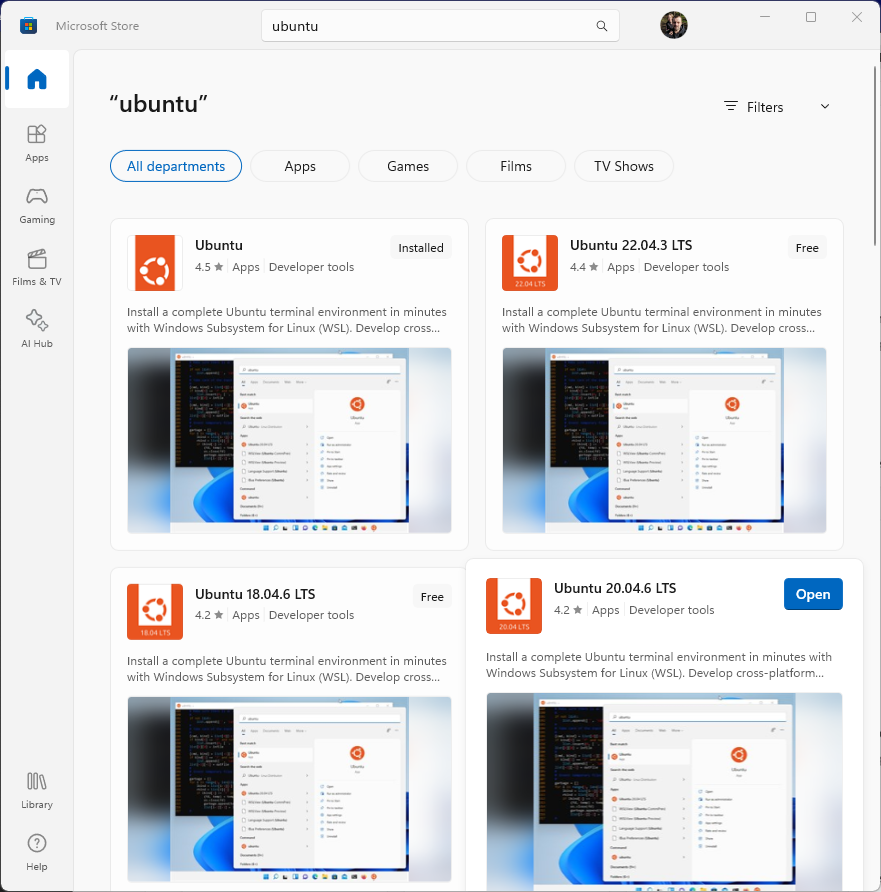
Alternatively, we can check installed and available WSL Distros via the Microsoft Store:
3. Installing a WSL Distro
We can have several different flavours of Linux distros installed on our Windows Computer using the WSL feature. By listing WSL available Linux distros as shown above, we can take the name of the distro and use that in the WSL install command.
# List available WSL linux distros for install
wsl -l -o
<# WSL Distro List >>
-- Ubuntu,
-- Debian,
-- kali-linux,
-- Ubuntu-18.04,
-- Ubuntu-20.04,
-- Ubuntu-22.04,
-- OracleLinux_7_9,
-- OracleLinux_8_7,
-- OracleLinux_9_1,
-- openSUSE-Leap-15.5,
-- SUSE-Linux-Enterprise-Server-15-SP4,
-- SUSE-Linux-Enterprise-15-SP5,
-- openSUSE-Tumbleweed
#>

# Install Kali Linux WSL
wsl --install Ubuntu
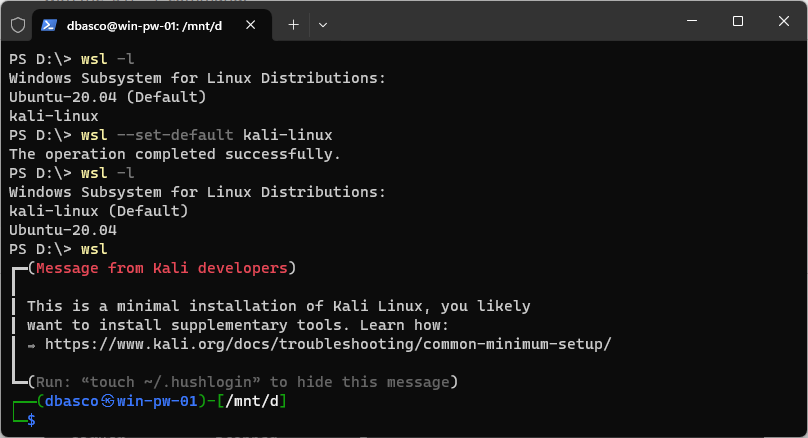
4. Changing Your Default WSL Distro
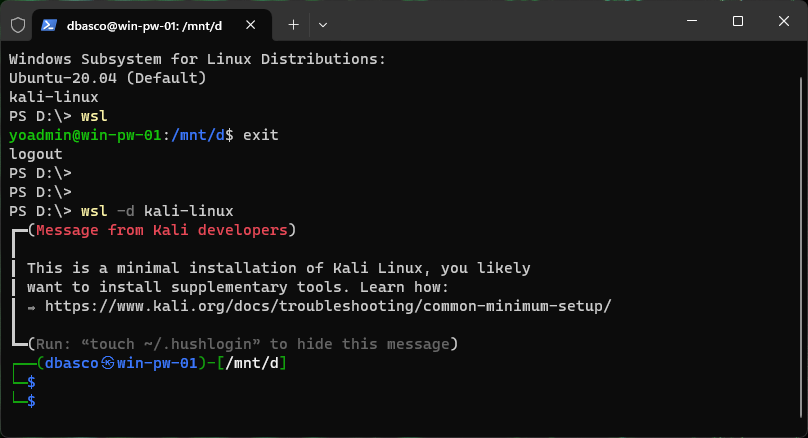
If you have multiple WSL Distributions installed, you will need to specify the Linux Distribution Name on some WSL commands. For example, if we run ‘wsl‘ in our PowerShell Terminal, it’ll log us into the default distro Ubuntu.
Here’s an example of entering and exiting the 2x installed WSL distros:
To set your default WSL Linux Distribution run the following command, using the Linux Distro Name returned with the ‘wsl -l‘ command:
# List installed WSL Distros
wsl -l

# Set Default Linux Distro WSL
wsl --set-default DistroName
That’s it! You’ve successfully installed WSL on your Windows machine, providing a seamless Linux environment for development and testing.
3 thoughts on “How to Install WSL on Windows”